Friday, November 9, 2012

JAI 143 - Just Add Colour Challenge

This week at Just Add Ink we have a colour combo to challenge  you.  I know it certainly challenged me.  Check out the colours we are working with


It's a combo that I really liked but gave me no inspiration at all.  Usually I get a feeling for the combo and what will be best suited to it, but this one, it just left me with crickets.  I really had no idea of what I was going to do until I went to Ikea last Sunday.  Whilst I was there I found these awesome placemats, awesome for 2 reasons; the patterns and the fact that I can just wipe them clean.  So my idea was formed, I was just going to copy the polka dot pattern, changing the Ikea colours with the challenge colours.  All was going well until I realised that I didn't have a solid polka dot that was just the right size.  I tried it with a star patterned dot but it wasn't quite working.  So, back to the drawing board. 

Whilst working with the star dot, I had a thought to use its coordinating die and do some partial die cutting to cut the edge of the card.  Good idea but what was I going to use for cutting plates, my normal ones were too big and wouldn't work with the partial die cut thing.  So I tried some cardboard from one of my SU delivery boxes.  Not quite thick or sturdy enough.  So I tried adding an extra cardboard shim.  Still not quite thick or sturdy enough.  Then I thought, what about one of my clear blocks?  It was certainly going to be thick enough but would it work, cause I only  had one and still needed to use some cardboard to protect the rollers in my die cut machine.  With nothing to lose, I flipped open the tabs on the platform and ran it though and this was the result


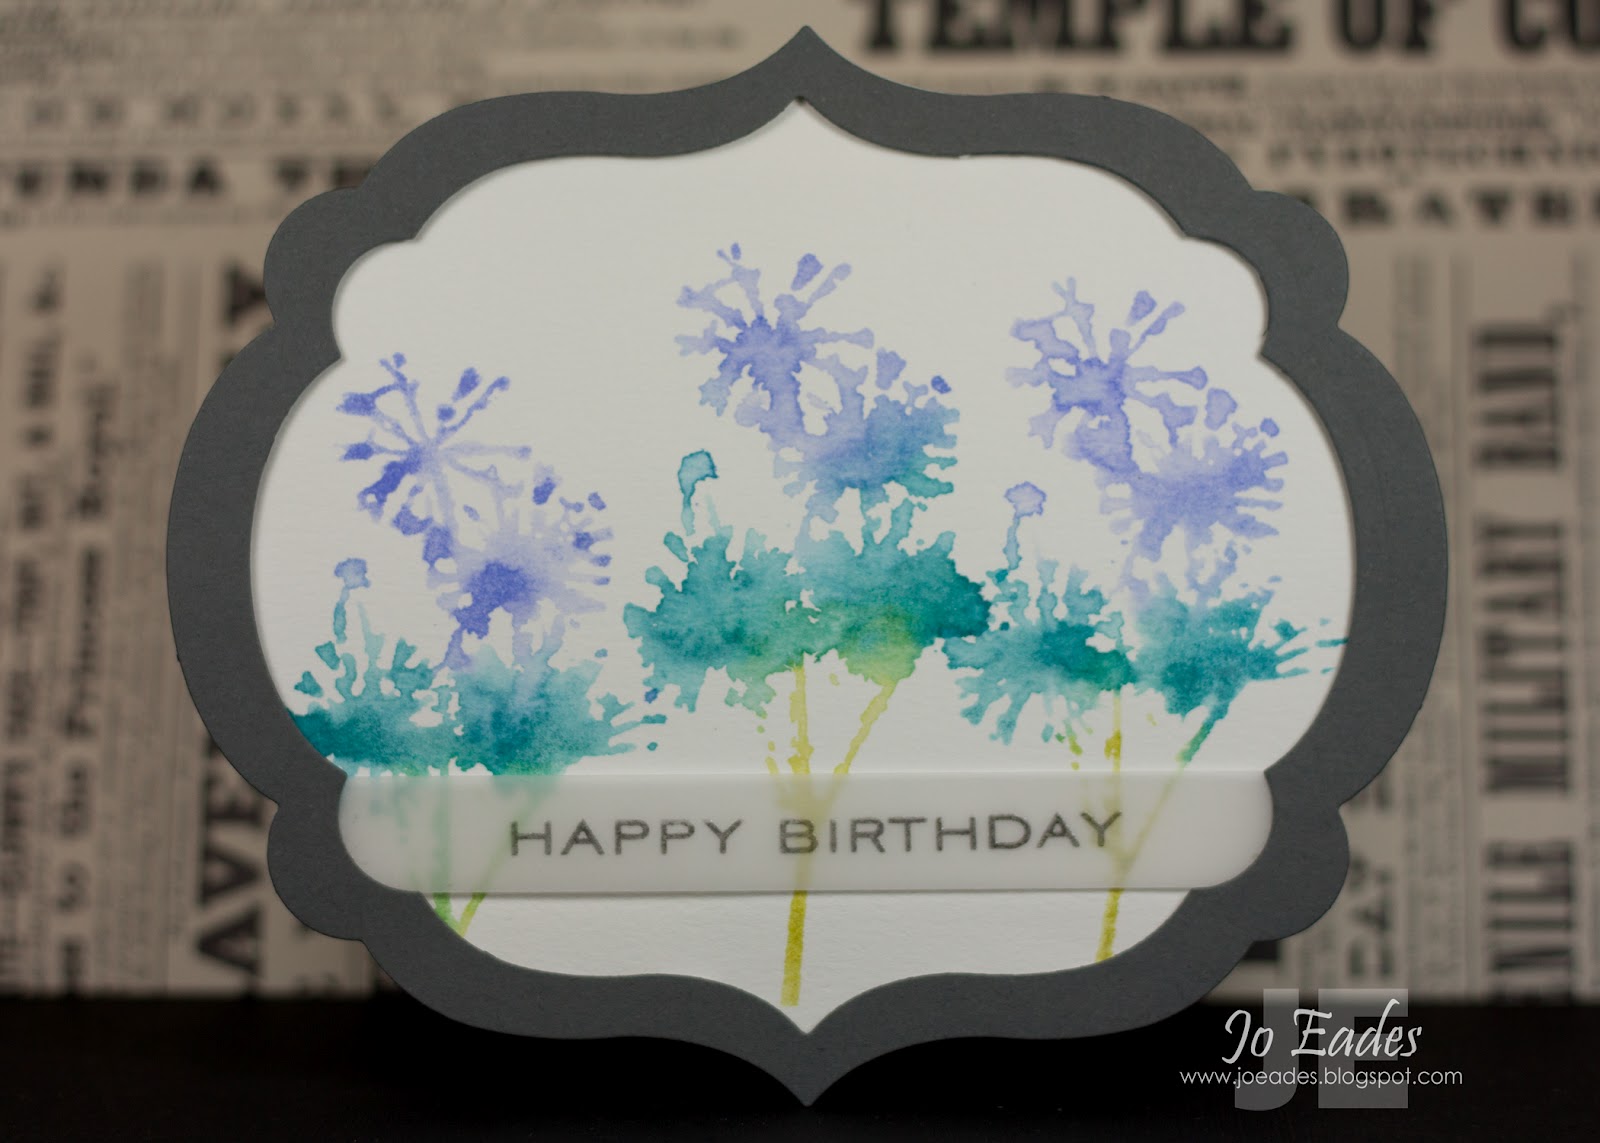
Woo Hoo - it worked, but it did put some marks in my clear block.  It took me some time to decide on exactly which sentiment I would use - I'm still not convinced this one was the best choice.

Then, whilst working on that card, I wondered what would happen if I flipped the big star spot over and stamped using the back of the stamp.  Check this out


Bingo - just the sized dot I was looking for.  So instead of 1 card I ended up with 2.  Love it when that happens :)

Well, that's it for me today.  Thanks for visiting and be sure to check out what the rest of the design team's awesome creations.

Hope you all have a wonderful weekend

Supplies Used:
Stamps:  Boy Basics - Simple Circles, Birthday Basics  (PaperTrey Ink)
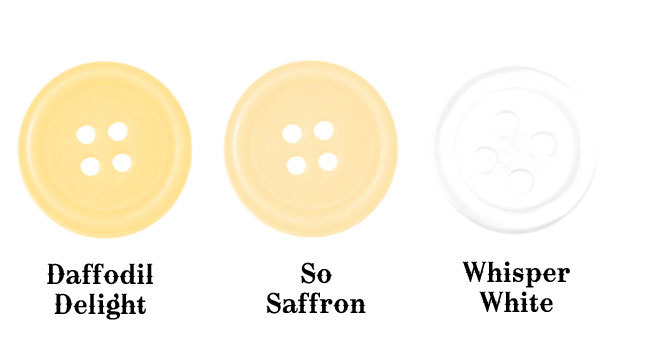
Ink:  Marina Mist, Sahara Sand, Tangerine Tango, Early Espresso (SU!)
Cardstock:  Whisper White (SU!)
Accessories:  Big Shot, Simple Circles die (PTI), Acrylic Block

Monday, October 29, 2012

JAI 141 Colour Challenge

Ooops.  In my hurry to get my streak ridden benches clean, I totally forgot to schedule my post for this week's challenge at Just Add Ink.  And since the weekend was a bust for free time, here I am posting now.

The challenge this week is a colour challenge, check them out


Aren't they pretty.   I decided to use my brand new stamp set - Summer Silhouettes to make my card for this week and this is how it turned out


I stamped the border image off once before stamping it on the card.  I like the  little extra detail it adds.  The sentiment is from the Made for You set, which is also new.  It was stamped with Distress Embossing Ink and embossed using Zing Brown Sugar embossing powder.  I used my favourite corner rounder to round the top corner.  The card is a note card sized card, same ones as SU! sells.  The proportions just looked a bit better. 

Harry gave this card to his teacher on Friday just gone as it was Teacher Appreciation Day. 

Well, I'm keeping it short & sweet tonight.

Thanks for visiting and I hope you can play along with us this week at Just Add Ink.

Supplies Used: 
Stamps:  Summer Silhouettes, Made for You (Stampin' Up!)
Ink:  Crumb Cake, Wisteria Wonder (Stampin' Up!), Distress Embossing Ink (Ranger)
Cardstock:  Very Vanilla (Stampin' Up!)
Accessories:  Heat Gun, Corner Rounder (retired) (Stampin' Up!), Brown Sugar embossing powder (Zing)

Friday, October 12, 2012

JAI #139 - Just Add Something Brand New

Hi there.  This week at Just Add Ink, Tina challenged us to use something brand new.  This threw me for a bit of a loop as I haven't bought any new crafting supplies since I placed my last order with SU! before resigning.  I couldn't really even remember what I ordered!  After wracking my brain I remembered that I had purchased Tim Holtz's Summer collection of Distress Inks recently and not used them yet.  This is what I made


I've used Picked Raspberry and Salty Ocean for the background - a technique I learnt during Tim's Creative Chemistry 101 course that I took earlier in the year.  Originally I thought it would end up being a birthday card but the sentiment that I wanted to use was just a little bit too big.  I wish the sentiment that I ended up using was just a bit bigger because it has become a little 'lost'.

I made the card base from watercolour paper because I wanted the panel to match the base.  It wasn't until about 20 minutes ago that I realised that I have completely covered it with ink and you wouldn't be able to tell what colour it was to begin with.  Der!!!!  I think I need a holiday.  It's hard to see, but I have actually scored a border all around the focal panel, just to add a bit of extra interest.

The image is from Tim's Nature's Moments stamp set and the sentiment is from SU's Teeny Tiny Sentiments.  Both have been stamped using Archival Black ink.

Don't forget to check out what the rest of the Design Team have designed for this challenge.  Lots of beautiful things to see!

Thanks for visiting and I hope you have a wonderful weekend.

Supplies Used:
Stamps:  Teeny Tiny Wishes - Stampin' Up!, Nature's Moments - Tim Holtz by Stampers Anonymous
Ink:  Picked Raspberry, Salty Ocean Distress Inks, Archival Black Ink
Cardstock:  Watercolour paper

Friday, September 14, 2012

JAI #135 - Just Add Colour Combo

Hello

This week we have a colour challenge at Just Add Ink.  Check them out


I must say that this week's sample is not the most imaginative thing that I've ever come up with.  I don't get a lot of crafting time, and for the past two weeks I've spent nearly all of it preparing for my son's birthday party, which we had on Sunday just gone.  Hopefully I can get back into a bit more of a routine now that it is all over.

Anyway, here is my sample for this week.


When I checked to see what the challenge was for this week and I saw it was this colour combo, it immediately reminded me of flower colours.  Then I thought about what flower stamps I had and remembered that I had this little beauty.  I love this stamp, and I must because after all this time, I still can't believe that I paid $22.95 for a SINGLE stamp!  It's made by Magenta.  The sentiment is an old favourite too from Savvy Stamps, one of my first 'international' purchases.  I wasn't sure they were still around but I've seen their name mentioned recently on a couple of blogs that I follow so they must still be in business.  I really like their clean & simple designs.

I stamped both the image and sentiment in Memento Tuxedo Black and coloured them with my Pro-Markers, which I am using much more than I ever throught I would.  I used Baby Pink, Crimson and Pear Green which were excellent matches to the SU colours.  I think I may have to put another little order in to get some more :)

Well, that's it from me.  Thanks for visiting and be sure to check out what the rest of the Design Team have come up with.

Have a good weekend (I'm looking forward to this one because, apart from doing the grocery shopping, I don't have anything else planned, well, except for the cleaning)

Supplies Used:
Stamps:  Flower by Magenta, Sentiment from Savvy Stamps
Cardstock:  Whisper White
Ink:  Memento Tuxedo Black
Accessories:  Baby Pink, Crimson and Pear Green Pro-Markers from Letraset

Friday, August 31, 2012

JAI 133 - Just Add Mustard & Metallics

This week the challenge at Just Add Ink is to Add Mustard and Metallics.  When I first saw this challenge I had a very different idea in mind but the more I thought about it, the more I couldn't envision it in my head, so I decided to go in another direction.

I had recently purchased a book, 1,000 Bags, Tags and Packaging (or something like that), which is basically a book full picutres of just that; bags, tags & packaging, which provides some great jump off points.  It was an image that I saw in the book which gave me the inspiration for this (I probably should add a photo of it, hey?)


I also took some inspiration from the August sketch from The Craft's Meow


To make my card, I took a mini mister that I had already made up with So Saffron reinker and some Ranger Antique Gold Perfect Pearls and added some More Mustard reinker to it.  Then, with my circle in place (so the misting lined up), I misted my card stock.  I originally had the '50' masked off, but when I removed the mask, I didn't really like the fact that the edge wasn't quite as crisp as I wanted, so I decided to add the die cuts.

Then I stamped what I call the 'paint swoosh' in Distress Embossing Ink and embossed with Silver EP.  I always thought that when you layered the EP, all you had to do was tip more EP over the still warm embossed piece, but after blowing it from one end of my desk to the other, this is obviously NOT the correct way to do it, lol.  So I inked the image a couple more times, until it was about 4 layers thick before stamping the sentiment (inked up with embossing ink) into the still warm EP.  I used the same technique for the '50', except I die cut them once I had finished adding all the layers

The card base is courtesy of Felicity.  Would you believe in all of the crap that I have, I did not have one single piece of silver cardstock???????  Thank Flick for coming to the rescue, it is just what I needed to finish the card off.

Thanks for taking the time to visit.  As always, be sure to check out what the rest of the Design Team's creations - they have shown some awesome ways to put Mustard to good use.

Have a great weekend

Supplies Used:
Stamps:  Typically Teen (The Craft's Meow)
Ink:  Distress Embossing Ink, So Saffron, More Mustard Reinker (SU!)
Cardstock:  Whisper White, Brushed Silver (SU!)
Accessories:  Big Shot, Circles #2 die, Timeless Type Junior Alphabet, Silver Embossing Powder, Heat Tool (SU!), Mini Mister, Antique Gold Perfect Pearls (Ranger)

Thursday, August 23, 2012

For Sale

I have just added a 'For Sale' page.  You can either click on the top menu button or access it through this link.  So far, all I have listed are accessories and it's probably not a complete listing because I am yet to to through all my stuff - there's a LOT, it's going to take some time.

Hopefully, I'll be able to add some of my retired stamps that I have already got boxed up (needed the room in my cupboard) soon,  and then some more once go through my cupboards.

I'd really like to try and sell everything here on my blog without having to resort to Ebay, primarly because I only know how to buy on Ebay, lol!

Please leave a comment/email me if you have any questions or need any additional information.

Thanks

Monday, August 20, 2012

Birthday Cards and an Invitation

Hello

Random post today to show some birthday cards that I've made.  Seems that July/August/September are birthday party central around here - a few of the cards I have already posted, here are a couple that I hadn't.

This first one was for one of Harry's school friends.  I linked up my Stripes embossing folder with Pink Pirouette ink and then ran it through my big shot.  Then I added some of the Big Shot adhesive sheets to some scraps of PP cardstock, die cut the letters and covered them with Dazzling Diamonds glitter.  Boy, those letters sparkle in real life.


This second card I made on the weekend for our friends daugther's 1st birthday.  I used my new Memorable Moments set which I preordered before resigning from SU - gotta make use of the perks before you give them all up.  I loved this set the first moment I saw it and was really pleased with how this card turned out, except for the multiple times I had to stamp it because I couldn't get the spacing just right, even using my SAMJ.  That's the problem of using Pink Pirouette ink, it's a bit light to see.  I did think to use a darker colour but I tend to be a bit rough when cleaning my stamps and often those clear mount ones come off whilst cleaning and you tend to go round in circles, cleaning, re-aligning, cleaning, re-aligning.  The ribbon flag alignment was a bit of a fluke.  I was trying to work out the best was to align them and when I looked down, they had kind of settled like that all by themselves.  Yay!


And now onto the invitation part of the post.  It's my sons' birthday in 15 days, just ask him, he's counting down the days.  Friday night I thought I'd best get my butt into gear and get some invitations done before his party comes around.  I had an idea that I fine tuned with him - he was quite adamant that the skateboard needed to be yellow!


The big green splodge is from Extreme Elements and is stamped in the new In Colour, Gumball Green, the blue stars are also from the same set.  The Skateboard is from PTI's Boy Basics:  Skater Dude (I think that's its name) and is stamped in another new In Colour, Summer Starfruit.  The light blue pattern is from SU's new Clockworks set that I received at the Melbourne SU! Heartfelft event.  The sentiment is from the retired Introducing set.

And this is what the inside looks like.  The big splodge is also from the Clockworks set and has been stamped in Crumb Cake.  The stars were stamped in Pool Party and the invitation body is from the Introducing set.  The corners were rounded using my most favourite corner rounding punch.  I cannot believe that I was able to stamp, die cut and put together 17 of these in 1-1/2 hours!!!!  I should have rang Guinness as this is some sort of stamping record for me!  Now I have to write on them all!


Thanks for visiting, hope you enjoy the rest of your day


Supplies Used:
Card 1
Cardstock:  Whipser White, Pink Pirouette (SU!)
Ink:  Pink Pirouette
Accessories:  Big Shot, Timeless Type Jnr Alphabet dies, Stripes Embossing folder, Big Shot adhesive sheets, Dazzling Diamonds glitters, Mat Stack 1, Layerz Mat Stack 1 (PTI)

Card 2
Stamps:  Memorable Moments (SU!, available 01.09.12), Background Basics: Tin Types (PTI)
Ink:  Pink Pirouette
Cardstock:  Whisper White
Accessories:  Big Shot, Labels Collection Framelits, Pretty In Pink satin ribbon

Invitation:  Outside
Stamps:  Clockworks (SU! available 01.09.12), Extreme Elements, Introducing (SU! retired), Boy Basics:  Skater Dude (PTI)
Cardstock:  Notecards (SU!)
Ink:  Gumball Green, Summer Starfruit (SU! available 01.09.12), Island Indigo, Pool Party, Basic Grey
Accessories:  Big Shot, Skateboard die (PTI), Corner Rounding punch (SU! retired)

Invitation:  Inside:
Stamps:  Clockworks (SU!), Extreme Elements, Introducing (retired)
Ink:  Crumb Cake, Pool Party, Basic Grey

Friday, August 17, 2012

JAI 131 - Colour Challenge

Hi there

This week at Just Add Ink we have a colour challenge, check them out


Kind of hard colours, don't you think.  Originally I was going to go with some sort of flower/tree design, as that was what first came to mind when I saw them but then I saw a image that Gayatri pinned to her Pinterest board and I this is what I ended up making.


It took me a few goes to get it looking like I wanted.  I did have one that I really liked but I decided to cut it down to make a square card and instead of cutting of 1 cm, I cut off 1" and ruined it.  Aaargghhh.

Since I have resigned from Stampin' Up! I can go into a little more detail about the products I have used.  The pattern is from an awesome set called Retro Foundations from The Craft's Meow.  I LOVE this set - the patterns and fonts are right up my alley.  I have clear embossed them on watercolour paper then coloured them using Antique Linen and Walnut Stain Distress Inks, which are pretty close to the SU! colours.  In fact, I did start out using the SU colours but I really didn't like the way the red base in the Chocolate Chip started coming out once I started adding water to it to get the graduation in colour.  The fact the Distress Inks don't break down when water is added is one of the reasons I started collecting them and I really love how I have been able to get 4 different shades using just 2 colours.

As you will probably notice, the sentiment is a favourite from PaperTrey Ink.  I do use it on a LOT of my cards, quite often it's not the first choice but it seems to be the one I end up with  because it tends to suit everything.  The button is also from PTI.

Well, that's all from me today.  Be sure to check out rest of the Design Team's  creations - they have some great ideas on using these colours.

Thanks for visiting and have a wonderful day & weekend

Oh, I just wanted to add, Gayatri has THE BEST Pinterest boards.  I don't know how she finds the time to pin everything she does, but I'm certainly grateful she does because she finds some AWESOME stuff.  Thanks Gayatri!


Supplies Used:
Stamps:  Retro Foundations - The Craft's Meow, Birthday Basiscs - PTI
Ink:  Antique Linen, Walnut Stain and Embossing Distress Inks - Ranger
Cardstock:  Chocolate Chip, Very Vanilla - Stampin' Up!, Watercolour Paper - LSS
Accessories:  New Leaf Button - PTI, Clear Embossing Powder, Heat Tool - SU!

Thursday, August 9, 2012

Ch, Ch, Ch Changes

Well, this week has been an emotional one.  On Tuesday, after almost 6-1/2 years, I resigned from Stampin' Up! which means I am no longer a demonstrator.  It's been something I've been thinking of for at least 12 months now, but after reading posts on Joan and Susan's blogs, I realised the time was right and I was ready to actually do it, instead of just thinking about it.

Now some of you are probably thinking to yourself, I didn't even know you were a demo, which is just another reason for going down this path :)  I joined SU! on the day they opened for business here in Australia and through that opportunity I have made lots of totally awesome friendships.  In fact, it has been those friendships that have kept me a demo all this time. 

So why resign?  Well, I have been my own best customer for the last 5 years.  Do you know how much stuff you accumulate over 6-1/2 years when you only make 1 - 2 cards per week?  Way too much.  Do you know how much stuff you actually USE when you only make 1 - 2 cards per week?  Not enough to justify the continual spending to make the required minimums to remain a demo.  It recently dawned on me that I can continue to buy what I want from my demo friends, I can continue to go to SU events as my friend's guest, so there is no reason for me to keep buying stuff that I don't need and don't use.

I will continue to use and buy SU - I still love their products but I will make more carefully considered decisions on what I buy now I no longer have minimums to make.  What I will be doing is selling off a LOT of my stuff.  So stay tuned, I hope to have a 'For Sale' page set up in the next week or so.

So, a big THANK YOU goes out to all that read my blog, to those who leave comments, to those that have supported me over the last 6-1/2 years as a demo - it is appreciated more than you'll ever know.

I'll be back next week with my JAI Design Team submission.

Thanks for visiting :)

Friday, August 3, 2012

JAI 129 - Sketch Challenge

Howdy

This week at Just Add Ink, we have a sketch challenge, take a look


I've got to say, I struggled with this.  I had stared and stared at this for weeks, with no real idea of what to do.  I thought I was going to have to admit defeat and tell the rest of the DT that I wouldn't have a submission until I had a brainwave.

This is what I came up with


I must say, I really like how this has turned out.  It's a simple take on the sketch, but it really is does reflect my style, which is why I am also going to link it up to this week's Case Study blog hop challenge.

I've also done something I don't normally do and that is colour.  I used my new Promarkers to colour the camera.  These are alcohol based markers and I really enjoyed using them, which was a bit of shock.  I might even use them again :)

Well, must dash.  Make sure you check out what the rest of the Design Team came up with and I hope you can join in with us this week.

Supplies Used: 
Stamps:  Oh Shoot (There She Goes Clear Stamps)
Ink:  Memento Tuxedo Black (Tsukineko), Ice Grey 2, Ice Grey 3, Ice Grey 4, Crimson, Honeycomb and Powder Blue ProMarkers (Letraset)
Cardstock:  Whipser White, Washington Apple DSP (long since retired) (Stampin' Up!)
Accessories:  Corner Rounder (retired) (Stampin' Up!)

Friday, July 20, 2012

JAI 127 - Just Add Colour Challenge

This week at Just Add Ink we have a colour challenge, check it out


Well, that graphic is not the best, so we are working with Basic Black, Whisper White and a colour of your choice.  I've chosen Gold


I've used a new background set from The Craft's Meow, which I embossed with Gold EP.  I must admit, that although I made things harder for myself than I needed to by stamping in a clear ink on white paper (what was I thinking??), it was pretty easy to line up and I actually only stamped it 4 times.  The card was originally going to be landscape, but that wasn't really working so I flipped it.  Actually, this wasn't at all what my card was going to look like but I had a few 'technical difficulties' with my original idea so decided to cut my losses and move on.

Well, that's it from me, I'm scheduling this post after a day at home with a horrible head cold/flu thing and I need to go and lie down again.

Thanks for visiting - hope you have a wonderful weekend.  Oh, don't forget to check out what the rest of the Design Team have created.

Supplies Used - All Stampin' Up! unless noted otherwise
Stamps:  Retro Foundations (The Craft's Meow), Birthday Basics (PTI)
Ink:  Distress Embossing Ink (Ranger), Archival Black (Ranger)
Cardstock:  Whisper White, Basic Black, Brushed Gold
Accessories:  Heat Tool, Embossing Buddy, Gold EP

Sunday, July 15, 2012

Colour Q 145

Hi, here today with a card I made for Colour Q 145 Challenge.  Look at this beautiful inpiration photo


I love this floral Washi tape.  I had heaps of ideas running through my head as to what I was going to do for this challenge as I am participating in the Online Card Classes Stretch Your Stamps class and am suffering from inspiration overload.  This is what I ended up making, which is a total 180 from some of my original ideas, lol!


I'm pleased with the way it's turned out as it's quite different from my normal style. I've used Distress Inks for all the stamping, using techniques I learnt from Tim Holt's Creative Chemistry 101 class.

Well, I must be off - had a massive unplanned sleep in this morning and have wasted 1/2 the day already.

Thanks for visiting.

Supplies Used:
Stamps:  Nature's Moments (Tim Holtz - Stampers Anonymous)
Ink:  Shabby Shutters, Mustard Seed, Wild Honey, Walnut Stain, Embossing Distress Inks (Tim Holtz - Ranger)
Cardstock:  Pear Pizazz, Chocolate Chip, Whisper White (Stampin' Up!), Watercolour Paper (LSS)
Accessories:  Craft Mat (Ranger), Mister, Heat Tool, Embossing Buddy, White EP, Big Shot, Beautiful Wings Embosslit

Friday, July 6, 2012

JAI 125 - Just Add Winter

Hello and welcome.  This week's challenge at Just Add Ink is to Just Add Winter, which is quite apt, considering how cold and wet it is here at the moment.

I started off trying to make a paper craft project for this theme, but that didn't really work out.  Then on Sunday our ducted heating decided it would be a fantastic time NOT to work.  On Tuesday night, I had a brain wave as to what to do for this challenge, and this is what I made.

This is my very first MDS page.  I had the brainwave to document our lack of heating and I thought MDS would be the way to go since I don't normally scrapbook and I needed something quick as my deadline was looming and I didn't have enough time to get a photo printed out to make a paper version.

This heater is the one I normally use in my studio, and whilst it keeps the studio toasty warm whilst I'm down there, our house was freezing unless you were 12" away from it :)  I also couldn't believe that SO many stores were sold out of heaters.  Hello, it's still winter people!  I am pleased to report we are now toasty warm in the house as we were lucky enough to have a replacement unit installed today and my little heater can return to it's rightful place.

Well, that's it from me.  Be sure to check what the rest of the Design Team have come up with - lots of lovely creations for you.

Thanks for visiting and stay warm

Sunday, July 1, 2012

Colour Q 143

Hey

I had to make a couple of cards for birthday parties this weekend and the Colour Q combo was just perfect for one of them.  Check out the colours


And this is my card


Cute, hey???  I hope Harry's little friend liked it.

Must dash, got a list of things to do as long as my arm.  Enjoy the rest of your weekend.  Thanks for visiting.

Supplies Used:  All Stampin' Up! unless otherwise noted
Stamps:  I Dig You, Best Dad Ever
Ink:  So Saffron, Poppy Parade, Pacific Point, Basic Grey, Distress Embossing Ink
Cardstock:  Whisper White, Basic Grey
Accessories:  Heat Tool, White EP, Silver Brads

Friday, June 22, 2012

JAI123 - Sketch Challenge

Hello, hello

This week at Just Add Ink we have a sketch challenge for you to try.


I admit I had a bit of trouble with one.  When I first saw it, it looked quite 'officy' to me - I think it was the clip - and I really couldn't think of any cool ideas to do with it so I just stuck to the sketch without any changes.  Take a look


I did try and add something to the background but it just didn't look right so I left it as is.  I tried to jazz it up a little bit by using this awesome red embossing powder that I've had for so long I actually forgot I had it, but it really has ended up being a little bit plain.

Make sure you check out what the rest of the Design Team have come up with - they were way, way more creative than I was.

Thanks for visiting and I hope your weekend will be warmer than ours :)

Supplies Used:  All Stampin' Up! unless noted otherwise
Stamps:  Birthday Basics (PTI)
Ink:  Distress Embossing Ink (Ranger)
Cardstock:  Crumb Cake, Very Vanilla, Notebook DSP (retired many moons ago)
Accessories:  Heat Tool, Clip from Clip Assortment, Corner Rounders (current & retired), Red EP (stash)

Sunday, June 17, 2012

Colour Q 141

Boy, this is the card that nearly wasn't.  I spent a good amount of time last night working on this and wasn't really happy with the way things were coming together.  I liked all the elements separately, just not together.  I had a quick look at it again this morning and had another idea.  After getting dinner started (yay for the slow cooker), doing 4 loads of washing, having lunch and cleaning the bathrooms, I finally got a chance to get back down to the studio.  And joy of joys, my 5 y o son decided to join me :)

Here are this week's colours


This is what I ended up making


Yes, it's not your eyes, the sentiment is slightly crooked, but as this was my 3rd card base and the line between sane and insane becoming increasingly blurred, I just cut my losses and moved on.

I should add, I DO like my son joining me in the studio, however he does like to be close (thus bumping me a LOT) and getting into everything.  He did learn today how to open my SU inkpads by himself and make sure he cleaned the stamps after he had finished.  We still have a bit of work to do with inking the stamp up and closing the ink pad once finished with it.  His hands are now various shades of brown, green and purple, lol!  I will be trying my scubbie out on him tonight.

Well, that's it from me, nearly time to get the rice on to go with our Rogan Josh curry, which smells so good.  Hopefully it will taste good too.

Thanks for visiting.

Supplies Used:  Stampin' Up! unless otherwise noted.
Stamps:  Pretty Peonies, Background Basics - Tin Types, Birthday Basics, Mat Stack 1 (all PTI)
Ink:  Brocade Blue, Night of Navy, Bashful Blue, Lucky Limeade
Cardstock:  Whisper White
Accessories:  Big Shot, Corner Rounder (retired), Mat Stack 1 die (PTI)

Sunday, June 10, 2012

Colour Q 140 - Card 2

Here's my 2nd card for Colour Q, which was inspired by this card of Julie Ebersole's


The shadow stamping idea came about by accident, but I'm pretty happy with how it turned out.  I did find it hard to mix and match images from different suppliers.

Supplies Used: 
Stamps:  Birthday Basics, Polka Dots Basics #2 (PTI), Nature's Moments (Tim Holtz for Stamper's Anonymous)
Ink:  Tempting Turquoise, Island Indigo, Real Red, Lucky Limeade
Cardstock:  Whisper White
Accessories:  Corner Rounder (SU retired - worst decision ever, lol)

Colour Q 140 - Bling Bling

I've managed to make 2 cards for this week's Colour Q challenge.  These are the colours for this week


I usually start these challenges by grabbing out my inkpads and stacking them together on my desk and then search for stamps that will go with them, cause I've found some stamps look better with certain colours.  I ended up having 2 ideas - this is the 2nd idea but the first card I made


This is the 3rd version of this card.  My original idea was to emboss the front using a mask to highlight the centre and then score around that centre panel.  That didn't work out as well as l would have liked so I decided on this popped up panel.  I was really excited as to how this was looking as I was adding all the rhinestones - they actually cover dots that are part of the stamps image - but now that it's finished, I'm not so sure about it.  So I decided to make another, which I will post separately (I'm going to enter both into the challenge)

Hope you're enjoying your weekend, it's a long one here, too bad it is SO cold.

Supplies Used: 
Stamps:  Background Basics - Retro, Birthday Basics (PTI)
Ink:  Distress Embossing (Ranger)
Cardstock:  Island Indigo
Accessories:  Heat Tool, White EP, Coloured Rhinestones (Kaiser)

Friday, June 8, 2012

JAI 121 - Just Add Pearls

This week at Just Add Ink our challenge is to Just Add Pearls.

I thought it would be fun to take the challenge one step further, this is what I made


I thought it would be fun to add Perfect Pearls too :).  I've stamped the doilies in the Perfect Medium that came with the Perfect Pearls kit then randomly dusted on some of the Gold, Green Patina, Blue Patina and Pewter powders.  It's very sparkly in real life.  I wish I had some other brighter colours but since it's taken me this long to get these colours, I figure I can wait a bit longer to get some more. 

Make sure you check out what the rest of the Design Team have come up with, gorgeous as usual.

Thanks for visiting.  Hope you have a wonderful weekend

Supplies Used:  All Stampin' Up! unless otherwise noted
Stamps:  Delicate Doilies, Fanciful Flowers (Annabelle Stamps)
Ink:  Perfect Medium (Ranger)
Cardstock:  Basic Black
Accessories:  Antique Gold, Green Patina, Blue Patina, Pewter Perfect Pearls powders (Ranger), Basic Jewels - Pearls, Modern Label punch

Sunday, June 3, 2012

Colour Q 139

Hello

I'm back with my card for this week's Colour Q Challenge, here is the inspiration piece


Such a cute top, I love the detail down the side seam too

And this is my card


This is about the 3rd version - my original inspiration came from a paper bag my son decorated last weekend with some offcuts he found lying around my studio, but as often happens, things tend to change on the fly for me. Hidden under this sentiment, is a version that was embossed directly onto the card.  Unfortunately it wasn't quite bold enough, so I added this one over the top, popped up on dimensionals.

I'm quite happy with the way this has turned out.  It kind of reminds me of those old fairisle jumpers your Nana used to make for you.

Hope you've been enjoying your weekend and thanks for visiting.

Supplies Used:  All Stampin' Up unless otherwise noted
Stamps:  On your Bike (Hero Arts/Sizziz)
Ink:  Distress Embossing Ink (Ranger)
Cardstock:  Crumb Cake, Bashful Blue, Night of Navy, Rich Razzleberry, Whisper White
Accessories:  Big Shot, Big Shot Adhesive Sheets, Ric Rac Die (PTI), Heat Tool, White Embossing Powder

Saturday, May 26, 2012

Colour Q 138

Evening

As we had plasterers in today finishing off the ceiling and patching up holes made by us removing old, ugly shelves, thermostats etc, there was nothing much to do but to head down to the studio since I have heating down there (having the heater on made it too hot for the plasterers).  It meant that I got a head start on this week's Colour Q challenge - these are the colours for this week's challenge


Aren't these heels so cute?  Anyway, my card was inspired by this wrapping paper I saw whilst doing some Christmas shopping last year


and this tutorial on how to make it.  I love this pattern, as you can see I've even used it for the background image of my blog.  Here's the finished card


Now, if there is anyone reading my blog that makes dies, I would really love it if you could manufacture one to make this pattern.  Whilst it is relatively easy to make, it is also really easy to mess it up.  Every now and again, the punched pieces misaligned ever so slightly and they didn't quite line up/join together as well as I would have liked.

The sentiment is from Best Dad Ever and has been embossed using White EP.  I made the flag ends because I don't yet have a die for that :)

Thanks for visiting, hope you're enjoying your weekend

Supplies Used:  All Stampin' Up unless otherwise noted
Stamps:  Best Dad Ever
Ink:  Distress Embossing Ink (Ranger)
Cardstock:  Whisper White, Crumb Cake, Pool Party, More Mustard, Poppy Parade
Accessories:  Heat Tool, White EP, 1-3/4" RD punch

Friday, May 25, 2012

JAI 119 - Sketch Challenge

Hello

This week at Just Add Ink we have a sketch challenge for you.  Take a look


And here's what I made


I really like how this has turned out.  I was extremely worried about the dreaded '3 brad element'.  In fact, it took me a couple of hours, and a couple of test runs before I actually got the guts up to pierce the holes in my card.  You're probably wondering what the big deal is, but if you look back at all the cards I've made, you'll see that I've NEVER put 3 brads in a row - every time I've tried they've just looked dumb and I've torn the card up and started again without the brads.

I was glad to finally open my Spice Cake DSP and put my new flower die to work.  Thanks Flickity Flick for my wonderful birthday present :)  The sentiment has been embossed using my very special, only to be used on special occassions, White Pearl EP, which has given the sentiment a beautiful pearlised sheen.  I've had it for ages and wish I had of bought more.

Well, that's it from me.  Make sure you check out the other Design Team's creations - they are all absolutely gorgeous.

Thanks for visiting and I hope you have a wonderful weekend.

Supplies Used:  All Stampin' Up! unless noted otherwise
Stamps:  Hmm can't remember the exact name - it was a SAB set from this year though
Ink:  Distress Embossing Ink (Ranger)
Cardstock:  Very Vanilla, Pool Party, More Mustard, Spice Cake DSP
Accessories:  Big Shot, Flower - Daisies #2 die, Dotted Scallop Ribbon Border Punch, Mat Pack, Paper Piercer, Heat Tool, More Mustard Brads, Tombo Mono Multi liquid glue, White Pearl EP (had for ages), Rustic Wood Button (PTI)

Saturday, May 19, 2012

ColourQ 137

Hi

Back again for Colour Q Challenge #137.  These are the colours we had to work with


Pretty, aren't they.  I wasn't quite sure what I was going to do with these, except that I knew it was going to be something floral.  Then on Tuesday, I was able to sign up for the 'A Cut Above' class for the Big Shot.  One of the topics was making shaped cards and they used the Stampin' Up! Framelits Labels Collection, which I have, and that got my mind ticking over.  This is what I made


I made my card using the largest framelit and then cut a piece of watercolour cardstock the same size and adhered that to the folded base.  Then I cut a frame using the largest and the next size down.  I used the Brushless Watercolour technique to stamp the images on the watercolour paper.  The sentiment is stamped using Basic Gray ink on vellum.  Since it is stamped on vellum, it stayed wet enough for me to emboss with clear EP.  The vellum strip is attached to the back of the frame and the frame is attached to the card using foam mounting tape, so it pops up.

You may be wondering how I got it to stand up like that.  Well, it's magic, lol.  Nope, the card stuck with dotto to the front of my black sharpener, which has blended into the background very nicely.

Well, that's it from me tonight.  It's late and I given myself a bit of an injury whilst photographing the card.  Ended up taking a tumble after my chair slipped out from under me as I went to sit back down on it after adjusting the card to make sure it was straight.  Going to have a bit of a bruise on my thigh I think :)

Thanks for visiting, hope you're enjoying your weekend.

Supplies Used:
Stamps:  Nature's Moments (Tim Holtz - Stampers Anonymous), Birthday Basics (PTI)
Ink:  Shaded Lilac, Shabby Shutters, Broken China (Tim Holtz - Ranger), Basic Gray (SU)
Cardstock:  Basic Gray, Vellum (SU), watercolour paper (LSS)
Accessories:  Big Shot, Framelits Labels Collection, Clear EP, Heat Tool (SU), Mini Mister (Ranger)

Thursday, May 17, 2012

Embellish Magazine Bicycle Colour Trend Challenge

I have wanted to play along with Embellish Magazine's challenges since they started but I've just never found the time.  Well, this week I have - yay.  Here's the inspiration photo and colour palette


Cool photo, hey?  Bikes are so popular at the moment.  I've even got myself one to ride around on.  Here's what I made to submit for the challenge


Unfortunately, out of ALL the ink I own, I don't really have a yellow that matches with this - I thought More Mustard would be OK, but it's not.  Too bad we didn't get Crushed Curry - that would have been perfect.  Oh well, I'll have to wait until the new 2012-2014 In Colors come out here - I think the yellow one will be a good match.

Anyway, I tried to make my own DSP using the bicycle stamps from my Hero Arts On the Go Bike set, the sentiment and the arrow diecut is also from the same set.  I like the way it has turned out - I just wish I had of had the right yellow.  It's annoying me.  I probably could have gone with a slightly darker blue too.  Oh well, at least I finally got to play along.

Thanks for visiting.

Supplies Used:  All Stampin' Up! unless noted otherwise
Stamps:  On The Go Bike (Hero Arts/Sizzix)
Cardstock:  Whisper White
Ink:  Basic Grey, Bashful Blue, Pumpkin Pie, More Mustard, Orchid Opulence (retired)
Accessories:  Big Shot, Dimensionals

Sunday, May 13, 2012

ColourQ 136

Oh my, what a busy day.  I thought Mother's Day was supposed to be nice and relaxing.  Oh well, it's been a good day, even if it's been non stop.

I'm really enjoying participating in the Colour Q challenges.  This week's colours are just gorgeous, take a look (I want this scarf)


I had lots of ideas spinning through my head for this week andI had a few shipments of new goodies on their way to me and I wasn't quite sure they would arrive on Friday.  Luckily they ALL did and this what I made using my brand new die. 


I've seen this Memory Box die on Debby's blog and thought it was just gorgeous, so when I had to order something, it just found it's way into my cart.  Funny how that happens. 

I have actually inlaid the die cut into the top panel which I found to be quite a fiddly task with two broken nails - couldn't pick anything up off my desk. A few deep breaths were taken when adding the sentiment, because everything was finished before I added that.  Thank goodness it is straight, with no smudges or inky outlines :)

I really love how it turned out and can't wait to use it again.  In fact, I  made another couple of cards using the cut white cutout from the white panel.

Well, got to go, I'm time converting in my head and that's never a good thing.

Thanks for visiting and I hope you've had a fantastic day


Supplies Used:  All Stampin' Up! unless noted otherwise
Stamps:  Botanical Silhouettes (PTI Anniversary)
Ink:  Always Artichoke
Cardstock:  Whisper White, Pear Pizzaz, Daffodil Delight, Tangarine Tango
Accessories:  Big Shot, Prim Poppy die (Memory Box), sticky strip, dimensionals

Friday, May 11, 2012

JAI 117 - Colour Challenge

This week at Just Add Ink, we have, what I thought was the hardest colour challenge ever!   Take a look


Looks pretty inoccuous but, boy, did I struggle with this.  It was SO hard to pair these colours together.  When I found something that would work with one, it would look awful with the other.  I think I went through 2 sheets of cardstock before I found a stamp set that I thought worked with them.  What do you think?


I really like how it turned out, and I finally used this set, which I really love, but hadn't used since I bought it.  The big and little circles (I guess that's what you'd call them) are stamped in So Saffron and the middle sized ones are stamped in Daffodil Delight.  The sentiment panel is Daffodil Delight, with the sentiment embossed in white EP.  I used a bit of bling to highlight the centres.

Make sure you check out what the rest of the DT have come up with - they didn't stuggle like I did and there are some beautiful cards for your inspiration.

Thanks for visiting and I hope you have a wonderful weekend.

Supplies Used:  All Stampin' Up! unless otherwise noted
Stamps:  Happiest Birthday Wishes, Spot Dot (PTI)
Ink:  So Saffron, Daffodil Delight, Tim Holtz Distress Embossing Ink (Ranger)
Cardstock:  Whisper White, Daffodil Delight
Accessories:  Heat Tool, White Embossing Powder, Basic Jewels - Rhinestones

Sunday, May 6, 2012

ColourQ 135

Hi

Back again this week for ColourQ challenge 135.  Aren't these colours sweet together?


When I saw them, I knew exactly what I was going to do.  Take a look


It hasn't turned out quite as cute as I imagined it in my head, but I'm pleased with it none the less.  I've had this set for awhile now but hadn't gotten around to using it.  The balloons were pretty easy to cut out, and the saffron one is popped up on a double layer of dimensionals.

Well, I'm off - it's been one of those days and I've still got 101 things to get done.

Thanks for visiting

Supplies Used:  All Stampin' Up! unless otherwise noted:
Stamps:  Up, Up & Away
Ink:  So Saffron, Ruby Red, Pool Party, Early Espresso
Cardstock:  Whisper White, Early Espresso
Accessories:  Big Shot, In the Meadow Die (PTI)